DIY Botanical Easter Eggs
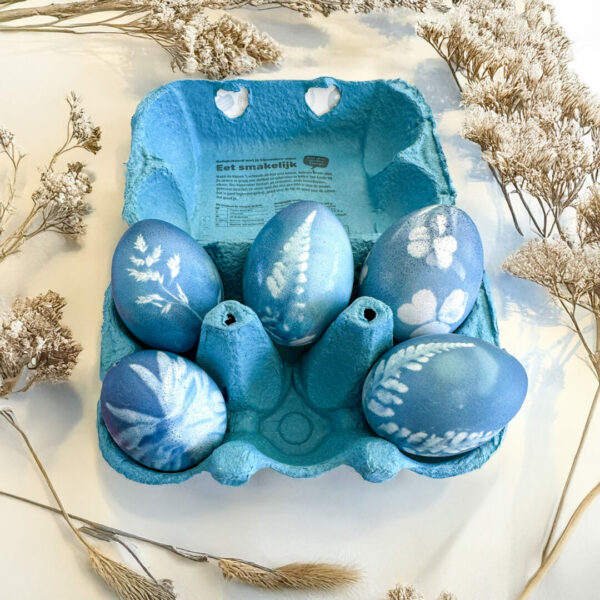
How to Create Gorgeous, Edible Easter Eggs with Red Cabbage and plants.
Looking for a fun and eco-friendly way to create beautiful Easter eggs this year? Skip the artificial dyes and embrace nature’s vibrant colors. With just a few simple ingredients, you can transform plain white eggs into stunning, nature-inspired works of art that are 100% edible. Plus, you get the added bonus of a beautiful centerpiece for your Easter table!
Here’s how to make your own naturally dyed Easter eggs using red cabbage and delicate flowers for a totally unique and sustainable touch. This DIY is easy to follow, and the results will surely impress your guests.
Gathering Your Tools!
- 1 head of red cabbage
- 12 eggs (either cooked eggs or hollowed eggs if you plan to use them for decor)
- Water
- Vinegar
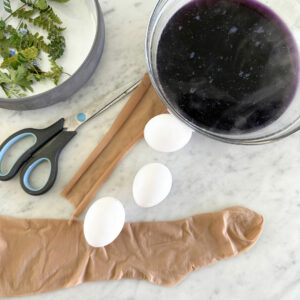
- Pantyhose (cut into pieces)
- String to secure the pantyhose
- Small plants and flowers (for decorative detail on the eggs)

Step 1: Prepare the Red Cabbage Dye
Start by chopping the red cabbage into small pieces. Place the cabbage in a pot, adding enough water to submerge the cabbage. Bring it to a boil, then let it simmer for about 20 minutes, releasing all the rich color from the cabbage. Once done, let the mixture cool completely, then strain the cabbage out. Add 1 teaspoon of vinegar to the liquid to help the colors set.
Step 2: Preparing the Eggs
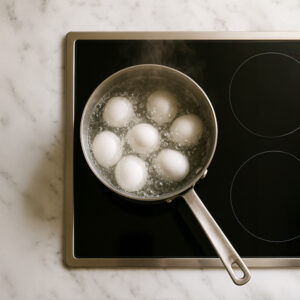
For this project, we recommend using boiled eggs—they’re more durable than empty eggs, and you can still eat them afterward! However, if you plan to keep the eggs as decor, you can hollow them out.
How to Hollow an Egg Without Cracking It:
- Create Small Holes: Start by gently using a pin or needle to make a small hole at both the top and bottom of the egg. The hole at the top will be your entry point, and the one at the bottom will let the air out as you blow out the contents.
- Blow Out the Contents: Hold the egg over a bowl and gently blow through the top hole. The contents should start to come out through the bottom hole. Keep blowing until the egg is completely emptied.
- Rinse the Egg: After you’ve emptied the egg, rinse it with water to remove any leftover bits of egg white or yolk inside.
Important Tip: Be extra gentle while hollowing out the egg, as the shell is fragile.
Step 3: Get Creative with Flowers and Plants
Next, gather small plants and flowers. You can use both fresh plants and dried plants—each will give a slightly different effect:
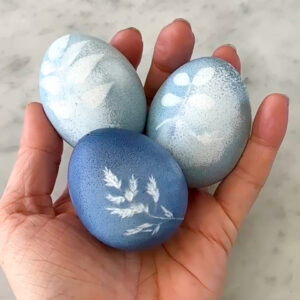
- Fresh plants: These will give you softer, slightly crimped edges, and the plant can sometimes leave a subtle impression on the egg, giving it a more delicate, natural look. The dye may also seep underneath the plant slightly, giving a more organic effect.
- Dried plants: These will provide sharper, more defined outlines and will create a cleaner print without the risk of the plant crimping.
Take your egg and carefully position your plant or flower on the shell where you’d like the design. Once you’re happy with the placement, take a piece of pantyhose and wrap it around the egg to keep everything securely in place.
Important Tip: Make sure to pull the pantyhose as tightly as possible without cracking the egg. The tighter the fabric, the less chance the dye has of seeping underneath the plant, ensuring you get a clean and crisp print.
Use string to tie the pantyhose tightly around the egg and plant, keeping everything in place. The more securely you wrap it, the better the print will turn out!
Step 4: Dyeing the Eggs
Now, it’s time to dye your eggs! Place your wrapped eggs in the prepared red cabbage dye. For the most intense and vibrant colors, let the eggs soak overnight. If you’re in a hurry, you can let them sit for just 2 hours, but the colors will be less rich.
Step 5: Finishing Touches
Once your eggs have soaked to the desired color, carefully remove them from the dye bath. Gently unwrap the pantyhose and remove the flowers or leaves.
Important Tip: If you’ve hollowed the egg, blow gently into the small hole to make sure any excess dye and water inside the egg is released. This will help prevent any mess and ensure a clean finish on the outside.
Rinse the eggs under cold water to remove any remaining dye, and set them aside to dry.
Step 6: Enjoy Your Natural Easter Eggs
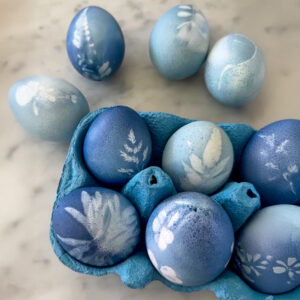
Now that your eggs are beautifully dyed, it’s time to enjoy them! You can display them as a stunning centerpiece on your Easter table, or package them up in an egg carton to give as a gift. And if you’ve had your fill of admiring their beauty, you can always eat them afterward! They’re just as delicious as they are beautiful. 🍽️
Why Go Natural?
This Easter, give your eggs an eco-friendly makeover with natural ingredients. Not only do they look stunning, but they’re free from harmful chemicals and dyes. Plus, you’ll be able to enjoy them as part of your Easter feast, making this DIY the perfect combination of beauty and sustainability.
Bonus Tip:
To preserve the beauty of your eggs, you can lightly spray them with hairspray to help them last longer as decorative pieces. This step will keep the colors vibrant and your floral designs intact.
Looking for something nature-inspired? Explore our collection for effortless beauty:
These might interest you

