
Loading cart contents...


Cyanotype Kit – DIY kit to make your own blueprints
This fun DIY kit is your warm welcome into the world of arts. Create your very own unique botanical art prints and discover the joy of cyanotype, a printing technique that uses the power of the sun!
This DIY kit has all the necessary materials to produce lots of gorgeous botanical prints:
-200 ml of cyanotype emulsion in powder form, just add water.
-A glass contact frame.
-24 sheets of assorted papers with different textures, A6 format.
-a foam paintbrush.
-a measuring cup, mixing cup and disposable gloves
-detailed instructions and a video tutorial available in 🇬🇧EN + 🇩🇪DE + 🇳🇱NL + 🇫🇷FR
Using this kit allows you to express your love of all things botanical in a new way. Follow the supplied instructions to capture little leaves, plants and flowers in impressive works of art for your home. No special talent or art experience needed, beautiful results are guaranteed every time.
When making cyanotypes for botanical blueprints, you’re using a unique photographic printing technique that depends on UV light from the sun. This makes it a great outdoor craft activity, to do on your own or with friends.
US$62.00
In stock
Description
Cyano-what? Cyanotype! What is it, then?
A cyanotype is a photographic printing technique, made using sunlight, that results in a cyan-blue print.
The process was discovered in 1842, and has been widely used by artists and photographers, but also engineers, as a way to create affordable copies of technical drawings.
Anna Atkins is considered to be the first woman photographer, and published a beautiful book called Photographs of British Algae: Cyanotype Impressions, documenting the shapes of her local seaweed varieties. With our kit, you can use the exact same technique to create your own blue artwork with plants.
How does it work?
When using our DIY cyanotype kit, you’ll create a light-sensitive sheet of paper. Then find a pretty leaf to use as your model, cover it with the glass and let the sun work its magic to print on the paper. The 2 x100ml bottles are plenty to use for the 24 sheets of paper. You can use the leftover materials on textiles (natural fibers such as cotton or silk), other papers, or even wood. The components in powder form can be kept for many years. Once mixed with water, you can keep it for a year or so. Did you use up your kit already, and you’re ready to make even more prints? We have a refill-pack available as well.
Final notes
-Video tutorial available with English, Dutch, German and French captions.
-Explore creativity. Create with nature’s shapes and your compositions.
– A botanical gift idea. Nothing more thoughtful than a personal print of their favorite flower, made by you.
– Bonus art print. We’ve included a reproduction of a cyanotype print made by Botanopia, just for you.
Additional information
| Volumetric Weight | 5348 g |
|---|---|
| Dimensions | 33 × 24 × 55 cm |
| Country of Origin | Netherlands |
| Product Video | https://youtu.be/Kh0S1TkAdMo |
| Brand | Botanopia |
| EAN | 613310875659 |
25 reviews for Cyanotype Kit – DIY kit to make your own blueprints
Only logged in customers who have purchased this product may leave a review.
Cyanotype Kit
A cyanotype is a photographic printing technique and one of the oldest processes in the history of photography. The results can easily be recognized by their intense cyan-blue color, which is created through its exposure to sunlight. The process of cyanotype was discovered in 1842 by the English scientist John Herschel in order to reproduce notes and diagrams. Anna Atkins, a British botanist and photographer, first used the technique to document the beautiful shapes of her local seaweed varieties and is considered to be the first woman photographer. Her book famous book ‘Photographs of British Algae: Cyanotype Impressions’, was the first book to be photographically printed and illustrated. The technique has been widely used by artists and photographers, but also engineers, as a way to create affordable copies of technical drawings. To this day, we use the term “blueprint” to mean a technical drawing, for example for the floor plan of a house.

To create beautiful cyanotypes, you need a mixture of two different solutions (A + B). The necessary chemicals come in powder form. As a first step, you’ll need to add water to each bottle, to create a solution. Shake the bottles very well to make sure all the chemicals are dissolved. Once you mix the A and B liquids together, they will become sensitive to UV light. Apply an even coat of this mix to your surface (paper, textile or even wood) and let it dry fully in the dark.
Next, think of your layout and composition. You can play with different objects (plants, flowers or flat objects will work well) and place them directly on your coated surface. To keep them in place, it’s helpful to weigh them down with a sheet of glass. When you are satisfied with your composition, you can expose it to the sun. The necessary exposure time will vary depending on the weather conditions, the height of the sun in the sky, and the type of objects you are exposing. In the sunlight, the color of the emulsion will slowly shift from a yellow-green to a bronze-gray color. You can begin with an exposure time of 10 min, and start adjusting from there.
After exposure, rinse your paper in a tray, under running water. Be careful not to hit your print directly with a strong jet of water, as it might damage the fragile paper.
This is when the magic happens! The area of the image that was exposed to UV light will take on the cyan blue color, and the parts of the paper that were protected from the light will rinse out.
The blue color intensifies as it dries and further oxidizes in contact with the air. You’ll get the darkest color after about 24hrs. You can also speed this up by using a couple of drops of hydrogen peroxide in your last rinsing water.


The chemicals required to make cyanotypes are (A) potassium ferricyanide and (B) ferric ammonium citrate. These two chemicals are presented in the form of a powder that is mixed with water, to become the cyanotypes sensitizer. While neither is highly toxic, you should avoid breathing the powders in. Always add water to your cyanotype powder (inside the blue bottles) and not the other way around. This way you’ll avoid having the powder dispersing in the air.
The cyanotype technique does not present any significant health risk. However, common sense applies. Do not ingest or inhale the chemicals, and wear gloves when handling the solutions.
Here are the Safety Data Sheets for the active chemicals: (A) potassium ferricyanide and (B) ferric ammonium citrate.
In powder form, each component (A and B) will last several years. Once mixed with water, the solutions can be kept for about a year, in their separate bottles. It’s possible that mold starts to form in the liquid. If this is the case, you can filter the liquid with a coffee filter and still use it.
Once you mix the 2 components A+B together, you should use the emulsion immediately, so only mix what you can use right away.
The Botanopia Cyanotype Kit has not been designed for children and has also not been tested for children. However, it can still be a very fun activity to do together with children. Once an adult has prepared the solutions and coated the paper, supervised children can continue with the next steps of the process and create their own artwork in the sun. Let them play around with different plants, leaves and flowers
The cyanotype emulsion reacts only to Ultraviolet light. Sunlight contains UV light, but if you’d like to make cyanotypes without sunlight, you can use artificial UV light for exposure. You can often find inexpensive second-hand sun-tanning lamps as your source of UV light. Small desktop models meant for tanning your face are a good choice to get you started.
Exposure and light
You don’t need a hot summer day to make cyanotypes. Even on a cloudy winter day you can expose your cyanotype prints with a few adjustments. In winter, there is less amount of sunlight available. The best time to work is around 12 noon, when the sun it at its highest point in the sky. You will need to increase the exposure time during the winter months. For example, a print that would take 5 min of exposure on a sunny summer day, might need 20 min of exposure on a cloudy winter day. Make sure to protect your work from any raindrops falling on the surface during the exposing process.
Yes, you can make cyanotypes without sunlight, as long as you have another source of UltraViolet (UV) light. UV lights are found in sun-tanning lamps for example. You will need to test the correct exposure time for your specific lamp.
The glass on your home’s windows may block some of the UV rays available in sunlight. While it’s not impossible, you’ll get better and faster results exposing your prints directly outside. Alternatively, you can also use an artificial source of UV light if you want to expose your cyanotypes without sunlight.
Yes, cyanotypes work on cloudy days and you can definitely expose them, it will just take a bit longer. For example, a print that would need 5 min of exposure on a sunny day, might need 20 min of exposure on a cloudy day. If it’s also a little rainy, make sure you protect your prints from potential raindrops…
The exposure time can vary depending on a lot of different factors, such as how sunny it is, the time of the year (winter/summer), and also the type of plants that you want to expose. For example, if you’d like to achieve beautiful transparency effects on thin petals, like a poppy flower, you’ll need extra exposure time. Too long, and the thin petals will completely disappear. So it’s all about experimenting and adjusting, based on your own situation.
Absolutely. If you've prepared your paper and let it dry away from sunlight, you can keep it for many months, as long as you keep it completely in the dark. Prepare a whole stack of paper and save it in a completely opaque box for the perfect sunny day to expose.
For best results, you need paper that can handle getting wet and drying again. You need to rinse your cyanotype extensively under water, so your paper will need to survive a long bath. Paper made for watercolors is always a good choice. Traditionally, premium watercolor papers are made of cotton (also called rag paper). For all papers, we recommend a thicker stock, at least 200gsm. Avoid papers that have a coating that will prevent your emulsion from absorbing into the fibers. You can also experiment with different colors of paper that will complement the blue tint of your print.
Yes, absolutely. Paper is made of cellulose, most often from wood pulp. So wood can act quite in the same way as paper when used in combination with the cyanotype technique. It can be a bit hit-and-miss though, depending on the exact type of wood you’re using, there are so many essences of trees. So you’ll have to experiment. In general, solid wood tends to give better results than engineered types such as veneer or plywood.
Yes, the cyanotype technique also works well on textiles made from natural fibres. For example; cotton, linen, wool, silk, hemp, bamboo but also fabrics derived from wood pulp such as viscose. Make sure to wash your fabric thoroughly first to remove any traces of starch or other stiffeners often used in the production process.
Cyanotypes are quite sensitive to detergents and soaps. If you make cyanotypes on textiles, they won’t be very washable. You can attempt to carefully hand wash your fabric, but always test a small corner first. Be sure to use a soap or detergent that does not contain any phosphates, bleach, or sodium. Be prepared to experience some lightening of the blue color with every wash, no matter how careful you are.
Yes, ironing will not be an issue at all, just make sure to choose a heat setting appropriate for the type of fabric you used.
Cyanotypes are not completely UV-resistant and can indeed fade a little if they are constantly exposed to direct sunlight. But if kept under the right conditions, they can last decades. Choose a room for your print with normal daylight and no direct UV-light impact, and the Cyanotype should be fine
To preserve your Cyanotype in the best conditions, don’t place them in direct sunlight. They are not entirely resistant to the impact of UV-light and can therefore fade. To further protect your print, you can frame the cyanotypes with UV-resistant glass and store them in a dry, cool environment with plenty of oxygen. If fading occurs, you can bathe your Cyanotype in hydrogen peroxide to restore its original color. The blue colors will also regenerate by placing the print in a dark space, such as a drawer or a cupboard, as long as enough oxygen is present.
If you want to embark on the cyanotype adventure, a complete kit is the best way to get started. The Botanopia Cyanotype Kit includes all the materials and tools to create your first blueprint, including detailed instructions and a tutorial. Once you feel comfortable with the included paper sheets, you can try it on your own paper or textiles like cotton or silk.
The cyanotype process is mostly based on experimentation. There are a lot of parameters that contribute to the final product, such as the type of flower or plant you use, the exposure time, and the intensity of the sun you're working with.
We've got some of the most common troubleshooting questions here in the manual. You can also have a look at our very detailed video tutorial for more tips.
Still not working for you? Get in touch!
The solutions A+B can have a slightly different color depending on the manufacturing batch. It can go from light yellow-green to a darker green-blue shade. That's nothing to worry about. As long as you prepared your bottles according to our instructions, and mixed the right amount of emulsion to use right away, and out of the sunlight, then there's no problem. If you're in doubt: just test one print in the sun. You'll soon see if the magic is happening as expected.
No, that's exactly as it should be. We ship the solution as a powder or a concentrated solution inside the bottles. This way you can extend the shelf life even longer. Just add water, as explained in the instruction manual, to get started.
Nice to hear you've already made lots of beautiful prints!
If you'd like to buy paper in a shop near you, ask your local art supplies store for cotton paper, sometimes also called rag-paper.
We also have a refill pack available for your cyanotype kit.
Great to hear you're ready for even more blueprints!
We have a refill pack available if you're ready to make more.
The cyanotype technique is really exclusively blue. That's even in the name, the colour cyan is the very beautiful blue shade you can expect your prints to be.
There are techniques to shift the colour of your blueprint to a slightly different hue, for example, more towards green, brown, black, or violet. If you're interested in this, look up the term "cyanotype toning". It can be done with common supplies like tea, coffee or wine, or with chemicals like soda ash.
You may also like…
-
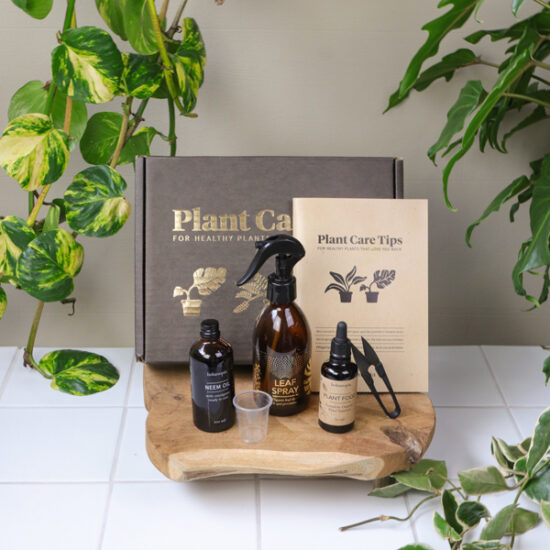
![Plant care kit in the jungle with all the product leaf spray bottle, neem oil, plant food, measuring cup, bonsai scissors and plant care tips book]()
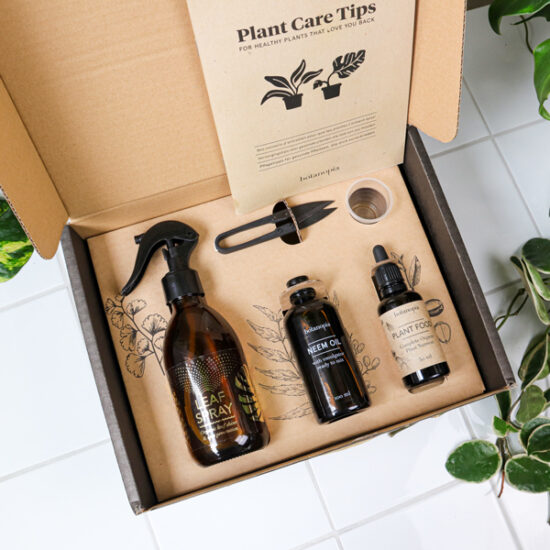
![Plant care kit from above with all the product laying in the box leaf spray bottle, neem oil, plant food, measuring cup, bonsai scissors and plant care tips book]()
-
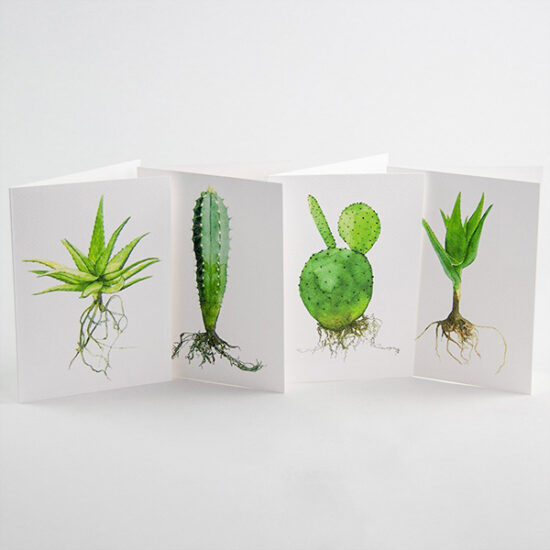
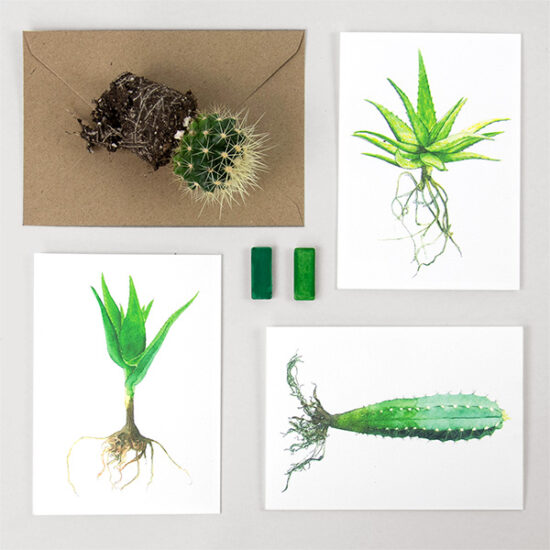
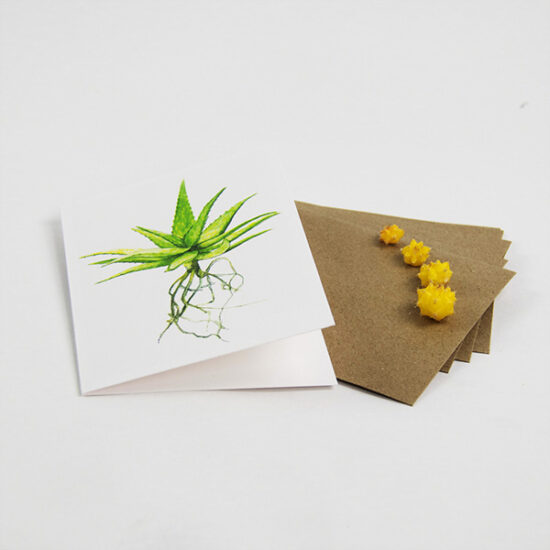
![all 4 cactus cards by Botanopia]()
![Our Paper Goods]() Out of stockOriginal price was: US$9.99.US$7.25Current price is: US$7.25.
Out of stockOriginal price was: US$9.99.US$7.25Current price is: US$7.25.
Scarlet Webster (verified owner) –
I got these to do with my daughter and she loves it! They turned out so good 🙂 First I was a bit sceptical about all the chemistry and mixtures, but with the tutorial it’s actually really straight forward. Definitely recommend!
Jeannette Hoogendijk (verified owner) –
Ik heb erg genoten van deze kit, een hele leuke techniek. Ik kende het helemaal niet, maar mijn resultaten zijn prachtig (vind ik zelf). je ziet alle kleine details van de planten en bloemen die je gebruikt. Ik ben normaliter geen ‘crea Bea’, dit is heel toegankelijk en de videotutorial is super.
laura wedler (verified owner) –
Wow wow wow. Habe jetzt nicht wirklich eine künstlerische Ader, aber mit dem Set klappt’s sogar bei mir. Die Drucke sind wunderschön und man sieht echt jedes Detail. Wird dieses Jahr definitiv ein Weihnachtsgeschenk 🤪
Lisa N (verified owner) –
Meine Freundin hat mich auf die Cyanotypie Methode aufmerksam gemacht, woraufhin ich auf dieses Kit gestoßen bin. Die Ergebnisse sind ein Traum und den Kids macht’s auch Spaß. Super!
Johanna H. (verified owner) –
Ich war zunächst etwas verunsichert, da es mit den verschiedenen Lösungen doch recht kompliziert aussah, aber das Video hat echt geholfen. Nach ein paar Runden hatte ich dann den Dreh raus.
Johanna Krause (verified owner) –
Gleich mit verschiedenem Papier und Materialien ausprobiert. Klappt wirklich überall ganz toll.
Ellen Lancaster (verified owner) –
Was a little confused how to do it but once I read the manual and understood the process it was so easy! Making my third one today! 💙
Coralie (verified owner) –
J’avais jamais essayé de faire des cyanotypes moi-même et j’avais peur de pas y arriver du premier coup mais en fait c’est tellement bien expliqué que c’est quasiment inratable
Malva (verified owner) –
I just finished my first prints and I love it! 💙🌞💦
Gabrielle Desnoyer (verified owner) –
J’ai regardé la vidéo pour m’aider et je suis très contente du résultat
Charlie H. (verified owner) –
Got my first couple done and now time to experiment with different textures! The tutorial video was very helpful. I find the technique very interesting and special.
Alice Lanvers (verified owner) –
Emballage magnifique et produits top
Marlinde (verified owner) –
Hele mooie verpakking (belangrijk voor cadeaugeven) en met zorg verstuurd, dat zie je echt. Ik heb de kit zelf nog niet geprobeerd, maar de ontvangster vondt het geweldig, een geslaagd presentje.
Ioanna Pipidi (verified owner) –
Great starting kit, with everything needed to create original cyanotypes! I got mine today and already made 4 cards, since it was a bright day 😊 The video and the manual were very helpful, the packaging beautifully prepared and it arrived fairly fast to Greece.
adeline b (verified owner) –
super ! très ludique, pratique, complet.
Fabienne G (verified owner) –
Belle qualité du produit conforme à la description .Une découverte de la technique de ce kit de cyanotype très appréciable .
MARIE-ODILE P (verified owner) –
Bonne impression au déballage du produit, nous attendons le soleil pour l’utiliser
MARTINE D (verified owner) –
très facile de réalisation et très bon rendu
Valerie C (verified owner) –
Produit de qualité. Explications claires pour débuter.
Stéphanie R (verified owner) –
Le kit me paraît bien mais j’attends de beaux rayons de soleil pour faire l’expérience .
Anne C (verified owner) –
Activité extrêmement intéressante, créative, abordable seul à tout âge, dès lors que l’on sait manier une pipette et aux résultats très motivants.
Françoise C (verified owner) –
Conforme à mes attentes.
adeline b (verified owner) –
super ! très ludique, pratique, complet.
Benedicte W (verified owner) –
Je vais pouvoir faire plein de belles choses!!
MARIE G (verified owner) –
Bon produit pour débuter dans la cuyanotooe. Le manuel est très ludique et permet une bonne utilisation. Et puis après c’est en pratiquant que l’on apprend