
Loading cart contents...



Botanopia — Cyanotype Tutorial
Cyanotype Tutorial: How to Make Botanical Sun Prints at Home
Learn how to make beautiful cyanotype prints at home with this step-by-step tutorial, from first-timer basics through advanced techniques.
▶ Watch the full video here
Full instructional video, 47:21. Every timestamp throughout this page jumps back here and plays from that moment.
Cyanotype printing is an early photographic printing process that uses UV light to create beautiful deep blue prints, also known as sun prints or blueprint prints. Every print turns out slightly different depending on the sunlight, the materials you use, and the exposure time.

How Does the Cyanotype Process Work?
The process works by coating paper with light-sensitive cyanotype chemicals. Once dry, the coated surface reacts to UV light. Objects placed on the paper block part of the light, creating silhouettes during exposure. Afterward, the print is rinsed to wash away unused chemicals, and the exposed areas oxidize into the characteristic deep Prussian blue.

What’s Included in the Botanopia Cyanotype Kit?
Our Botanopia Cyanotype Kit includes everything you need to get started with cyanotype printing at home.
Inside the kit, you’ll find:
- Cyanotype chemicals (Bottle A & B) to create your light-sensitive emulsion
- Different types of paper to experiment with
- A foam brush for coating your paper
- Gloves to protect your hands while working
- A mixing cup, measuring cup, and stirring stick
- A glass frame and clothespins for exposing your prints in the sun
- Printed instructions to help you get started
- A detailed product manual

Learn the Basics of Cyanotype Printing
Protect Your Work Surface & Your Hands
▸ video 00:52Cover your table with newspaper, scrap paper, cardboard, or a plastic sheet before you begin. We also recommend putting on gloves before coating your paper.

Prepare Bottle A & Bottle B
▸ video 01:42These bottles contain the cyanotype chemicals in powder form. Always add water to the powder, not the other way around. Fill both bottles to the marked line, close tightly, and shake well until fully dissolved.
If, after several months of storage, you notice a small amount of mold in Bottle B, that’s not a sign it’s ruined, just strain it through a coffee filter and keep using it.

Let’s Talk About Light
▸ video 02:20Once Bottle A and Bottle B are combined, the solution becomes UV-sensitive. The good news: you do not need a darkroom, normal indoor lighting is fine. Simply close the curtains and work under electric room light while preparing and coating your paper.

Mixing the Cyanotype Emulsion
▸ video 03:12Mix equal parts Bottle A and B, we start with 10 ml of each, usually enough for 10 to 15 sheets of paper. Once mixed, the emulsion is immediately UV-sensitive, so only mix what you’ll use right away.
Don’t worry if your mixed emulsion looks a little different batch to batch, sometimes more blue-green, sometimes more yellow, that’s completely normal and has no effect on your finished prints.

Coating Your Cyanotype Paper
▸ video 05:30Use the foam brush to apply a thin, even layer. For a more intense, saturated blue, apply a second coat once the first has fully dried.
Note to self: don’t use a brush with any metal parts (including metal crimps on the ferrule), metal can react with the emulsion. Already covered properly later in “Tools for Applying Cyanotype Emulsion,” no change needed there.


Once coated, let the paper dry completely away from light. Avoid stacking sheets before they’re fully dry, residual moisture can transfer emulsion onto the back of the sheet next to it.

Choosing Plants & Flowers for Cyanotype Printing
▸ video 08:16Thin leaves, delicate flowers, grasses, and ferns press closely against the paper. Ferns and grasses give fine detail; sweet pea gives curved stems and tendrils; poppies give transparent petals, though they’re fragile; dried flowers hold up well when fresh ones are out of season.
Judge a plant by its shape, not its color, cyanotype only reads contrast between light and dark. If a stem has been sitting in water, dry it off first, droplets leave visible stains on your finished cyanotype.

Setting Up Your Cyanotype Frame
▸ video 11:19Arrange your plants on the coated paper, then place the glass frame on top. Clothespins along the edges keep the glass secure.

Exposing Your Cyanotype Print in the Sun
▸ video 13:02Place your frame in direct sunlight. Exposure time varies with season, time of day, and cloud cover, treat any number as a starting point, not a rule. Start with five minutes and adjust from there.

Rinsing & Developing Your Cyanotype Print
▸ video 13:19Rinse in a tray of clean water or under a gentle stream, avoiding forceful pressure. Keep rinsing until the water runs clear, if it’s still yellow when you lift the print out, it needs more time.
Speeding up oxidation
A spray bottle of water with a small amount of hydrogen peroxide (3% is a good choice) speeds things along after rinsing, mist it on, add a touch more if the color doesn’t deepen. Entirely optional, skipping it just means waiting a day or two longer.

Learn the Basics of Cyanotype Printing
Protect Your Work Surface & Your Hands
▸ video 00:52Cover your table with newspaper, scrap paper, cardboard, or a plastic sheet before you begin. We also recommend putting on gloves before coating your paper.
Prepare Bottle A & Bottle B
▸ video 01:42These bottles contain the cyanotype chemicals in powder form. Always add water to the powder, not the other way around. Fill both bottles to the marked line, close tightly, and shake well until fully dissolved.
If, after several months of storage, you notice a small amount of mold in Bottle B, that’s not a sign it’s ruined, just strain it through a coffee filter and keep using it.
Let’s Talk About Light
▸ video 02:20Once Bottle A and Bottle B are combined, the solution becomes UV-sensitive. The good news: you do not need a darkroom, normal indoor lighting is fine. Simply close the curtains and work under electric room light while preparing and coating your paper.
Mixing the Cyanotype Emulsion
▸ video 03:12Mix equal parts Bottle A and B, we start with 10 ml of each, usually enough for 10 to 15 sheets of paper. Once mixed, the emulsion is immediately UV-sensitive, so only mix what you’ll use right away.
Don’t worry if your mixed emulsion looks a little different batch to batch, sometimes more blue-green, sometimes more yellow, that’s completely normal and has no effect on your finished prints.
Coating Your Cyanotype Paper
▸ video 05:30Use the foam brush to apply a thin, even layer. For a more intense, saturated blue, apply a second coat once the first has fully dried.
Note to self: don’t use a brush with any metal parts (including metal crimps on the ferrule), metal can react with the emulsion. Already covered properly later in “Tools for Applying Cyanotype Emulsion,” no change needed there.
Once coated, let the paper dry completely away from light. Avoid stacking sheets before they’re fully dry, residual moisture can transfer emulsion onto the back of the sheet next to it.
Choosing Plants & Flowers for Cyanotype Printing
▸ video 08:16Thin leaves, delicate flowers, grasses, and ferns press closely against the paper. Ferns and grasses give fine detail; sweet pea gives curved stems and tendrils; poppies give transparent petals, though they’re fragile; dried flowers hold up well when fresh ones are out of season.
Judge a plant by its shape, not its color, cyanotype only reads contrast between light and dark. If a stem has been sitting in water, dry it off first, droplets leave visible stains on your finished cyanotype.
Setting Up Your Cyanotype Frame
▸ video 11:19Arrange your plants on the coated paper, then place the glass frame on top. Clothespins along the edges keep the glass secure.
Exposing Your Cyanotype Print in the Sun
▸ video 13:02Place your frame in direct sunlight. Exposure time varies with season, time of day, and cloud cover, treat any number as a starting point, not a rule. Start with five minutes and adjust from there.
Rinsing & Developing Your Cyanotype Print
▸ video 13:19Rinse in a tray of clean water or under a gentle stream, avoiding forceful pressure. Keep rinsing until the water runs clear, if it’s still yellow when you lift the print out, it needs more time.
Speeding up oxidation
A spray bottle of water with a small amount of hydrogen peroxide (3% is a good choice) speeds things along after rinsing, mist it on, add a touch more if the color doesn’t deepen. Entirely optional, skipping it just means waiting a day or two longer.
▸ reference
Cyanotype FAQ & Troubleshooting
Can You Make Cyanotypes Without Sunlight?
Yes. A UV lamp works too, many artists use one in winter or for controlled indoor exposure. It only reacts to UV light, so regular indoor lighting is safe to work under.
Small gel-nail UV lamps can work, though they’re built for a much shorter cure than cyanotype needs, expect 10 to 20 minutes rather than a few. On its own the lamp sits too low and close, try upcycling a cardboard box to prop it up higher so it can cover a full sheet. Always test with a step strip first.
Is Cyanotype Printing Safe?
Generally low-risk for home use, with a few real precautions. Inhalation: the main risk is the dry powder, always add water to it, not the reverse. Skin: may irritate, rinse with water, gloves prevent it. Eyes: flush with water for several minutes, see a doctor if irritation continues. Ingestion: don’t induce vomiting, drink water, call a doctor or poison control if more than a trace was swallowed.
Disposal: diluted rinse water from normal hobby-kit use is generally fine down a household drain. If you’re working at commercial quantities rather than occasional hobby use, check your local wastewater regulations first, rules (and how septic systems handle it) vary by location and we don’t want to give you a blanket answer that doesn’t hold everywhere.
Adult supervision is recommended with children.
Can You Store Coated Cyanotype Paper?
Yes. Many people prepare it in advance for sunny days, and it can be kept for months as long as it’s stored somewhere completely dark.
What Paper Works Best for Cyanotype Printing?
Watercolor paper is a favorite, but any paper strong enough to survive rinsing without falling apart works. The two things that matter: it absorbs liquid well, and it doesn’t disintegrate when wet. Cotton rag paper is usually the premium option if you want to go further, but there’s a wide range that works.
How Long Do Cyanotype Chemicals Last?
Stored separately, Bottle A and B can last for years sealed away from sunlight. After several months of storage, a little mold can sometimes appear in Bottle B, that isn’t a problem, just strain it through a coffee filter. Once mixed, use the emulsion the same day.
Why does my cyanotype still look pale or grey after it’s fully dried?
Usually underexposure, but can also be your water, alkaline tap water or “acid-free” paper fights the chemistry. A splash of white vinegar in your rinse water usually fixes this.
If instead your whites are coming out pale blue, the paper likely picked up UV exposure before you placed your negative or objects on top. Stay away from UV light and direct sun until you’re ready to expose.
Why does my mixed emulsion look a different color than last time?
This is completely normal, batches can come out more blue-green or more yellow depending on the chemistry. It has no effect on your finished prints, what actually determines the final color is exposure and rinsing, not the raw emulsion color. Nothing is broken.
Troubleshooting
Why Is My Cyanotype Print Not Blue?
Bronze, grey, or dull before rinsing is normal. Once rinsed and dried, the deep blue appears and deepens.
Can I Keep the Bronze Color and Skip Rinsing?
Not really, unrinsed chemicals keep reacting to light and eventually go muddy or disappear. Rinsing locks in the final blue.
There’s Condensation on My Glass. Is That a Problem?
Normal with fresh, moisture-rich flowers. Can soften the print slightly, use dried flowers for sharper detail.
Troubleshooting Imperfections in Cyanotype Prints
Uneven brushstrokes, stains, or spots are normal and often add handmade character. A purple haze right after rinsing can disappear once fully dry. You can also cut away imperfect sections and turn the good parts into cards, bookmarks, or collage pieces.
My Print Curled While Drying. How Do I Flatten It?
Press it under heavy books overnight, or carefully iron the back on low heat once completely dry. Heavier watercolor paper curls less than thinner paper.
Advanced Cyanotype Techniques
ToolsMastering ExposureTest Strips
Transparent FlowersPreserving Plants
DandelionsLayeringGraphic Templates
LaceFeathers & Handwriting
Tools for Applying Cyanotype Emulsion
▸ video 15:55The provided foam brush contains no metal, which matters, metal-containing brushes (including metal crimps where the bristles meet the handle) can react with the solution.

Mastering Cyanotype Exposure
▸ video 16:30There’s no single right exposure time, it depends on your light source, paper, and how dense your negative or objects are. In the video, we expose the same flower at three different durations side by side and compare the results to decide which looks best, that side-by-side comparison is much easier to see than to describe, watch this part of the video for the full demonstration.

Working With Test Strips
▸ video 19:00Start with a small coated piece of paper and a flower on top, just like a normal print. Then use opaque cardboard to cover part of it during exposure:
- Cover two-thirds of the print and expose for 5 minutes
- Cover one-third and expose for another 5 minutes
- Expose the whole print for a last 5 minutes
This gives bands of 5, 10, and 15 minutes total exposure to compare after rinsing. Download our printable test strip PDF to make the same test strip shown in the video, or generate one automatically with our free Cyanotype Negative Maker.

Exposing Transparent Flowers
▸ video 20:23Thin petals let UV through unevenly, creating soft gradients. Poppies and sweet peas work especially well. Underexposed loses subtle detail, overexposed loses the delicate gradients, watch the video to see the difference side by side.

Preserving Your Plants & Flowers
▸ video 21:33Dry flowers in a flower press or heavy book. Very delicate flowers like poppies can be fragile fresh, sandwich them between two overhead transparency sheets, securing the edges with tape.

Printing with Dandelions
▸ video 23:14Fresh dandelion stems release a milky sap that can stain your paper. Place them between two transparent plastic sheets first.


Layering & Multiple Exposure
▸ video 24:01Place multiple plants on top of each other for overlapping detail, or try multiple exposures: place your first layer, expose a few minutes, remove some plants, add new elements, continue exposing. How long you leave an element in place controls how visible its ghost layer is.


Using Graphic Templates
▸ video 26:34Printed or hand-cut graphic shapes work the same way as plants, anything opaque blocks UV and stays white.

Printing With Lace
▸ video 27:37Lace’s open, irregular weave creates intricate patterns, playing with how much UV passes through the gaps.


Printing Feathers & Handwriting on Your Prints
▸ video 28:01 / 28:33Feathers
Fine, semi-translucent barbs catch light unevenly, producing soft, textured prints.

Handwriting
Write on a transparency sheet with an opaque marker, then expose it like a negative.


Advanced Cyanotype Techniques
ToolsMastering ExposureTest Strips
Transparent FlowersPreserving Plants
DandelionsLayeringGraphic Templates
LaceFeathers & Handwriting
Tools for Applying Cyanotype Emulsion
▸ video 15:55The provided foam brush contains no metal, which matters, metal-containing brushes (including metal crimps where the bristles meet the handle) can react with the solution.
Mastering Cyanotype Exposure
▸ video 16:30There’s no single right exposure time, it depends on your light source, paper, and how dense your negative or objects are. In the video, we expose the same flower at three different durations side by side and compare the results to decide which looks best, that side-by-side comparison is much easier to see than to describe, watch this part of the video for the full demonstration.
Working With Test Strips
▸ video 19:00Start with a small coated piece of paper and a flower on top, just like a normal print. Then use opaque cardboard to cover part of it during exposure:
- Cover two-thirds of the print and expose for 5 minutes
- Cover one-third and expose for another 5 minutes
- Expose the whole print for a last 5 minutes
This gives bands of 5, 10, and 15 minutes total exposure to compare after rinsing. Download our printable test strip PDF to make the same test strip shown in the video, or generate one automatically with our free Cyanotype Negative Maker.
Exposing Transparent Flowers
▸ video 20:23Thin petals let UV through unevenly, creating soft gradients. Poppies and sweet peas work especially well. Underexposed loses subtle detail, overexposed loses the delicate gradients, watch the video to see the difference side by side.
Preserving Your Plants & Flowers
▸ video 21:33Dry flowers in a flower press or heavy book. Very delicate flowers like poppies can be fragile fresh, sandwich them between two overhead transparency sheets, securing the edges with tape.
Printing with Dandelions
▸ video 23:14Fresh dandelion stems release a milky sap that can stain your paper. Place them between two transparent plastic sheets first.
Layering & Multiple Exposure
▸ video 24:01Place multiple plants on top of each other for overlapping detail, or try multiple exposures: place your first layer, expose a few minutes, remove some plants, add new elements, continue exposing. How long you leave an element in place controls how visible its ghost layer is.
Using Graphic Templates
▸ video 26:34Printed or hand-cut graphic shapes work the same way as plants, anything opaque blocks UV and stays white.
Printing With Lace
▸ video 27:37Lace’s open, irregular weave creates intricate patterns, playing with how much UV passes through the gaps.
Printing Feathers & Handwriting on Your Prints
▸ video 28:01 / 28:33Feathers
Fine, semi-translucent barbs catch light unevenly, producing soft, textured prints.
Handwriting
Write on a transparency sheet with an opaque marker, then expose it like a negative.
▸ video 29:00
Printing on Plastic
Print directly onto transparency sheets with an inkjet or laser printer to create your own cyanotype “negatives.” Convert to black and white first, invert for a more photographic result. Experiment with illustrations, photographs, typography, silhouettes, and graphic shapes.

▸ digital negatives
Working With Digital Negatives
Using our free tool
Our free Cyanotype Negative Maker turns your own photo into a negative automatically, right in your browser.


Which film and printer?
Match OHP transparency film to your printer, inkjet or laser, they aren’t interchangeable, check the packaging.
Getting a dense enough negative
If one printed negative isn’t dense enough, print it twice and layer both sheets in registration.
Mixing Photography, Plants & Graphic Shapes
▸ video 30:09Combine a printed negative with real plants or cut templates in the same exposure, for silhouettes, layered compositions, and strong contrast between sharp and organic elements.


Printing With Plastic Bags
▸ video 31:15Thin plastic bags create soft textures and gradients, wrinkled plastic creates organic waves, layered plastic creates darker and lighter areas, transparent packaging creates geometric shapes.

Using UV Lamps for Exposure
▸ video 31:38UV lamps let you work indoors, in winter, or at night, with consistent results. You can even place a small UV nail lamp inside a cardboard box to prop it up and spread light over a larger area.


Materials to Print Cyanotypes On
▸ video 34:40Besides watercolor paper: colored paper, leftover packaging, tea boxes, book pages, cotton, silk, wool, viscose, and paper towels.


Wet Cyanotype Techniques
▸ video 36:56Coat your paper, don’t let it dry, place objects on the wet surface, add ingredients, expose while wet. Try soap bubbles, turmeric powder, vinegar, or salt.


Toning Your Cyanotype Prints
▸ video 39:30Soak fully dried prints in tannin-rich liquids, black tea, green tea, coffee, or red wine, to shift the blue. To tone: fully expose, rinse, and dry; bleach briefly in 1–2 teaspoons of washing soda per liter of warm water; rinse; soak in your tea/coffee/wine bath starting around 30 minutes; rinse again and dry.


Other Colors of Sun Prints: The Anthotype Technique
▸ video 41:13Anthotypes use light-sensitive pigments from plants instead of iron chemistry. See our turmeric anthotype tutorial.

Materials to Print Cyanotypes On
▸ video 34:40Besides watercolor paper: colored paper, leftover packaging, tea boxes, book pages, cotton, silk, wool, viscose, and paper towels.
Wet Cyanotype Techniques
▸ video 36:56Coat your paper, don’t let it dry, place objects on the wet surface, add ingredients, expose while wet. Try soap bubbles, turmeric powder, vinegar, or salt.
Toning Your Cyanotype Prints
▸ video 39:30Soak fully dried prints in tannin-rich liquids, black tea, green tea, coffee, or red wine, to shift the blue. To tone: fully expose, rinse, and dry; bleach briefly in 1–2 teaspoons of washing soda per liter of warm water; rinse; soak in your tea/coffee/wine bath starting around 30 minutes; rinse again and dry.
Other Colors of Sun Prints: The Anthotype Technique
▸ video 41:13Anthotypes use light-sensitive pigments from plants instead of iron chemistry. See our turmeric anthotype tutorial.
Cyanotype on Shells, Pebbles & Textiles
Shells
Prime with beaten egg white, let dry, coat with emulsion, place plants while wet, wrap in plastic, expose, rinse gently.

Pebbles
Same egg white primer process as shells. Over-rinsing or scrubbing can lift the layer along with the print.

Cyanotype on Textiles
▸ video 45:20Fabric absorbs emulsion differently than paper. Cotton, linen, silk, wool, and viscose work best. For garments, slide cardboard inside first to keep the fabric flat.
A note on washing
Cyanotype on textiles is not wash-fast. It will fade over time even with gentle hand-washing in a natural soap, modern detergents fade it faster, but no washing method fully protects it long-term. It’s best suited to pieces that won’t be washed often, decorative pillows, wall hangings, or tote bags you handle gently rather than everyday garments. Watch the video for a closer look at how this plays out in practice.


Ready to Start Creating?
From beginner prints to advanced botanical sun printing, cyanotype is a beautiful way to experiment with sunlight, plants, and creativity.
Ready to Get Started?
Chemicals, paper, a foam brush, gloves, mixing tools, a glass frame, and a detailed product manual, everything listed at the top of this guide, in one box.
Buy nowYou Might Also Like
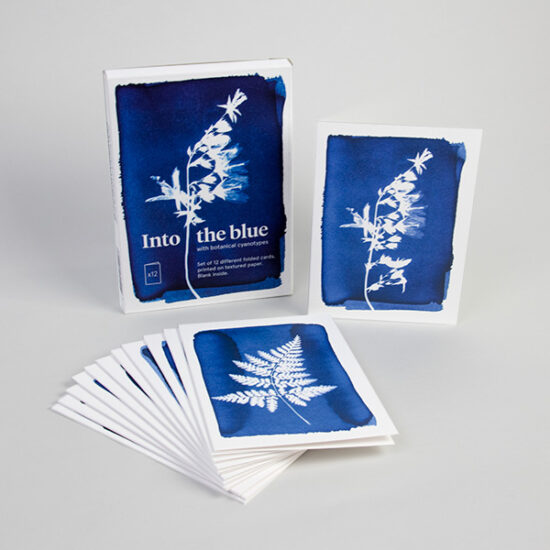
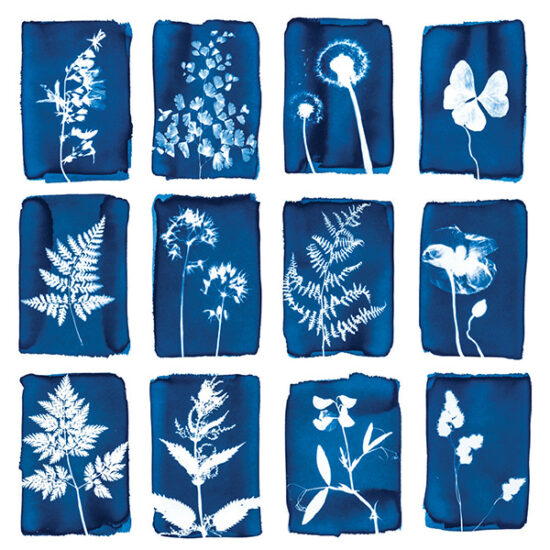
Looking for more inspiration before you start your own cyanotype? Check out our gallery below.