Loading cart contents...
How to repot all your plants.
A step-by-step guide with video tutorial
Table of Contents
show the contents
Beginner's guide to repotting your houseplants.
So, you’ve finally created your urban jungle? As the novelty wears off, some questions might come up. `My spider plant looks a little too high in its pot’ or `am I a good plant parent?’ Maybe you’ve changed your color scheme for the fifth time (we don’t judge); and you need a matching pot? There’s plenty of reasons a plant may need repotting. Regardless of your situation, this guide will teach you when to repot a plant and what tools are necessary. We’ll tell you how to efficiently do the job, what potting soil to use, and the best way to clean up after repotting. We’ll even cover the controversial topic of drainage holes. So yes, quite extensive.
Repotting can be confusing, especially for first-time plant parents. We’re here to help with clear visuals and a video to guide you. Wondering where to start or what to get? Our Botanopia repotting kit is the perfect package and includes everything you need in one convenient and cost-efficient kit. Now that the pleasantries are out of the way, let’s dive in!
How to know when to repot a plant
There’s no specific rule for how often plants should be repotted. Approximately 12- 18 months is a close guesstimate. There’s a lot of factors to consider. Here are a few signs your plants need a new home:
1. Your plant is root-bound. Also known as pot bound. This happens when a plant outgrows its pot and the roots tangle themselves in a spiraling mass around the edges of the pot. This will constrain the growth. It could also be observed in plastic pots. The mass of roots starts to deform the shape.
2. Your roots are poking out of the pot. While a few smaller roots poking out of the drainage holes may not necessarily be cause for repotting, larger roots may indicate a lack of space for growth.
3. The plant is potted too high in the pot. This leaves no room for watering from the top. Best to repot in a bigger pot to simplify your watering routine.
4. Your plant is growing slower than usual or has stopped growing altogether.
5. Your soil is compacted and lacks air pockets that are vital for the roots of your plants. When you water, the water runs along the side of the pot and does not get absorbed. Time to treat your plant to fresh potting soil.

What do you need to repot a plant?
You’ll need a pot to start with. if your plant has outgrown its pot, a bigger one should do the trick. Aim for one that is 2.5 – 5 cm (1-2 inches) wider. A pot bigger than that can lead to overwatering and eventually root rot.
Repotting can be a messy activity, and we wouldn’t want to add another chore to our list. Our Botanopia potting tarp makes repotting hassle-free whether you’re propagating, pruning or spraying! Lastly, a trowel, potting soil, and a watering can will come in handy.
Pro-tip for your nails:
Don’t like getting dirt under your fingernails?
You could wear gloves, of course…
But another easy way is to dig your fingernails in a bar of soap before you start. You’ll leave a little bit of soap underneath the nails.
When you’re done, the soap will dissolve quickly under warm water, leaving your nails clean. Easy-peasy.

Let's get into it!
While removing your plant from the pot, you might struggle taking it out. Instead of pulling and damaging the roots, moisten the plant. You can do this by soaking the pot for half an hour. After removing the plant, if the leaves are tightly packed, gently untangle them to space them out. Emergency scenario: if the pot is still too tight, cut it off with scissors.
You’re now ready to add your plant back into the new pot. Start by adding a little soil into the pot and for a perfect fit, use your old pot to make the perfect hole in the soil. Add your plant back in and make sure to leave room for watering. Now generously water your plant, and voilà! Your plant is now repotted and happy to grow in a better environment.
Step by Step Video Tutorial
In this tutorial, we show you the repotting basics.
How to recognize when it’s time to repot, what you’ll need and how to go about it.
Learn all about soil (and soil-less options)
What potting soil do I use?
As a beginner, you may wonder what soil to use. Should you reuse your old soil? Maybe the soil in your garden? Or do you need a special mix?
Garden soil is not recommended as it’s often compacted and waterlogged, reducing airspace around the roots and preventing circulation in the pot. It may also contain weeds seeds, insects, and diseases if not sterilized.
So, what makes for good potting soil?
You need your soil to be lightweight, be able to retain moisture, and have plenty of air around the roots. Potting mixes come in varying recipes depending on the plant type. Ultimately, it should contain an organic component such as compost or tree bark, a component to ensure moisture is retained like vermiculite or perlite, and sometimes sand and nutrients.
How to make your own potting mix
Are all potting mixes the same? While some components of potting mixes are shared, different plants have different needs. These are the more common mixes you can make:
Aroids
Aroids thrive best in lush jungle like conditions. For a moist and nutrient-packed recipe, try this mix: two parts potting mix, three parts perlite, and four parts orchid bark. Optional: add one part worm castings, or fertilise well with an organic fertiliser during the active growth season.

Orchids
There are three types of orchid categories
- Terrestrial- they grow in soil
- Epiphytes-they grow on trees or shrubs
- Lithophytes- they grow on rocky soil
For terrestrial orchids, denser mixes are ideal. Use a mix of equal parts sand, sphagnum moss, and gravel. For an epiphytic orchid, combine five parts fir bark, one part perlite, and one part coconut coir. Lithophytic orchids require more drainage and aeration. Use eighty percent fir bark and twenty percent coarse sphagnum moss.
Cacti and other desert-loving plants
Cacti and succulents need well-drained and porous potting mixes. Use three parts potting soil, three parts coarse sand, and one part perlite for a great DIY mix. If you create a big batch of the potting mix, you can store it in an airtight container to preserve it.

General purpose indoor plant mix
Most people just use straight up potting soil from the garden center. If you want to try a soil-free mix, for general houseplant potting, suitable for most types of other plants (besides the 3 special cases above), use two parts pre-moistened coir, one part perlite, and half part vermiculite.

Do I even need soil?
Soil is not the only medium you can use to repot plants. There’s plenty of other substrates or even just water. Hydroponics, the process of growing plants in water has become increasingly popular for its ability to require less space, water and maintain faster growth. Without soil, you also avoid all soil-related diseases and pests. It’s also often easier to control the watering.
Here are different types of substrates you could also try:

Water
Water is perhaps the easiest method of growing plants for urban gardeners. All you need is water and a glass to contain it! No more worrying about pets digging through soil or spilling and making a mess. Your plants are also less likely to contract diseases and pests.
It’s also a great method for anyone looking into low-maintenance plants. You don’t have to worry about over or under watering your plants. With beautiful vases, your plant display can look elegant, and you can curate it to fit your aesthetic.
Pick a jar, fill it with water and place a small cutting in it. Place the plant under indirect sunlight and watch it grow! It’s important to change your water at least once a week to keep the roots well oxygenated. And yes, it also works for cacti and succulents. Curious? We have a complete guide to transitioning your plants from soil to water here.

LECA
LECA is becoming increasingly popular with plant lovers. What is it anyway? As an acronym, it stands for Lightweight Expanded Clay Aggregate. Even without a green thumb, the little clay balls are a perfect soil replacement, requiring less watering and providing structural support.
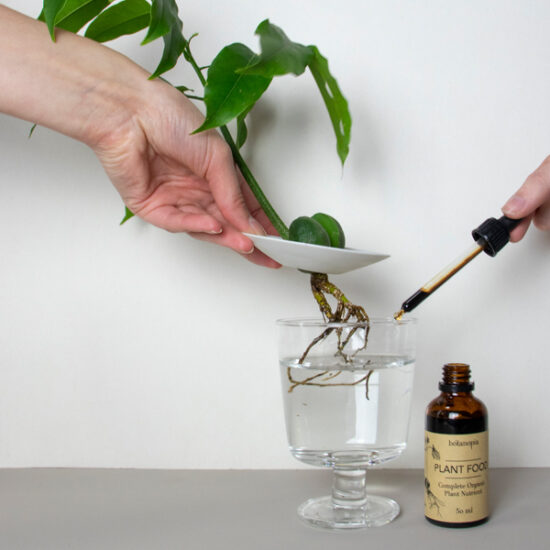
Because it’s inorganic, LECA offers no nutrients of its own, and a liquid fertilizer such as our Organic plant food is required. The big advantage is that no pests can survive in it. Since it doesn’t decompose, you can reuse LECA over and over again if you clean it well. When transitioning a plant from soil to LECA, be sure to rinse the plant of organic material, allow the roots to dry, and use a hydroponic friendly fertilizer.

Lechuza Pon
Pon is a new alternative to conventional soil gardening. It is a mix of pumice, zeolites, lava rock, and fertilizer. As pon is a mineral-based substrate, it prevents fungi from attacking roots.
With its air-permeable structure, pon does not condense and can be used for years without replacement. Basically a smaller version of the LECA for a different aesthetic.

Vermiculite
Vermicu-what? This word is a mouthful, and it’s also likely you’ve never seen vermiculite before. It’s a shiny mineral that can absorb three times its volume in water. It comes in small pieces, a bit like very lightweight gravel.
Furthermore, it’s ideal for thirsty plants that require a lot of hydration. Don’t use it for plants that like well-drained soils like cacti though, or you’ll risk getting root rot.

Perlite
Unlike ocean gems, perlite bears no resemblance to pearls. What they are though, is basically (inedible) volcanic rock popcorn. Perlite resembles tiny plastic balls rich in silicon. It holds both water and air and is great at keeping your soil aerated.
A good substitute for perlite is lava rock, which is small pieces of hardened lava. If you live in a volcanic area, this could be a great local option that requires less energy to produce.
Coconut coir
Coconut fiber, also known as coir, is a great hydroponic medium. It’s the leftover fiber on the outside of the coconut shell. It’s an effective renewable source as it retains up to ten times its weight, keeping plants hydrated. It can also be a useful pest management tool, as insects don’t like settling in coir. It doesn’t contain any nutrients of its own, so you have to supplement.
Good to know:
The problem with peat
(and to a lesser extent, sphagnum moss)


Peat, harvested from peat bogs is a lightweight, soilless medium used in potting mixes and even as a way to grow hydroponically. What’s the dirt on peat though?
Although it is organic, peat is a non-renewable resource taking thousands of years to form. Harvesting it also releases carbon dioxide into the air.
Unlike compost, peat contains no nutrients to sustain plants.
Peat naturally occurs in a few countries around the world. Since it has to be internationally shipped, it contributes to climate change. A good alternative is coconut coir, an easily available substrate created from coconut harvest leftover. Read more on the coconut coir below
What is sphagnum moss then? And is it similar to peat moss?
Sphagnum moss is a living plant that grows on top of the wetland’s bog. While peat moss contains organic matter from plants and animals, sphagnum moss is dead and decayed. Sphagnum moss is harvested using a vacuum harvester and then dried for commercial use. Being a key component in peatland ecosystems, its continuous harvest leads to the release of carbon in the air, making it climate unfriendly.
Sphagnum is found in an ecosystem containing a lot of plant and animal species. By harvesting it, the wetlands are destroyed. It is also considered a non-renewable source. That’s because it grows really slowly. Harvesting then causes permanent damage. Avoid using sphagnum when possible. Perlite, for instance, is a great alternative for rooting cuttings.
I've just repotted my plants. What's next?

What do I do with my old pot?
You may be wondering how to clean/disinfect old pots for reuse. Here’s how to remove white deposits on terracotta pots
You want to start by physically removing dirt clinging to the pot. Then scrub it clean with a hard brush and soapy water. Bleach is the most common ingredient to get sterilize your pot and get rid of fungus and pests. You can soak your pot in one part household bleach and nine parts water for ten minutes to disinfect it. After it’s disinfected, you can use vinegar to clean your pot and get rid of the ugly white deposit. Add one part vinegar to three parts water and soak your pot overnight.
You can now go ahead and use a hard brush to scrub any remaining stains. Rinse your pot in cold water and air dry it for your next use. Pro-tip, you can also put your pots in a dishwasher.
Cleaning up
Lucky for you if you have a potting tarp as you can just tip the contents in the bin. If not, start by collecting all the loose dirt and debris with a little brush or a vacuum cleaner. If using a newspaper, crumple the paper and dump its contents into a garbage bin or a compost pile if available.
Make sure your tools are properly cleaned, as they can spread diseases from a sick plant to a healthy one. When should you clean your tools then?
- When using your tools on a diseased plant
- Before storing your tools away for winter
- Before using the tools in spring if they weren’t cleaned
Wash your tools with soap and water to get rid of grime. Then make use of a hard bristle brush to scrub caked up dirt and hose it down with a pressured tap. Most wood tools naturally repel bacteria and fungi. They however get dirty. Clean wood tools with warm soapy water and let them dry. Wipe them down with wood preservatives to keep them in good shape.
When to fertilise your soil mix/potting soil
Store-bought potting soil often has fertiliser mixed in. In that case, there’s no need to add more fertiliser for the first few months. When you create your own potting mix though, you need to add some. If you have compost, you can add that to the mix as an alternative. If you don’t have compost, you can choose between organic and synthetic fertiliser.
Organic fertiliser is a better option as it’s sustainable and will not harm organisms or burn the soil. It actually contains beneficial bacteria that are useful for the plant roots. Two types of fertilisers you can use are:
- Slow release granular fertiliser
This fertiliser is released into the soil when watered. Check the manufacturer’s instructions for how to use it. The application will last a month then you can add more.
- Liquid fertiliser
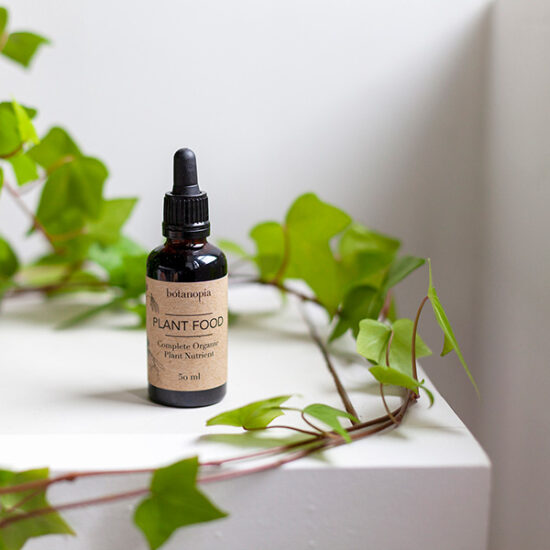
This fertiliser is soluble in water and you can mix it per the instructions given. Our Botanopia organic plant food is nutrient-packed and easily soluble. We have a little more information about how to use it here.
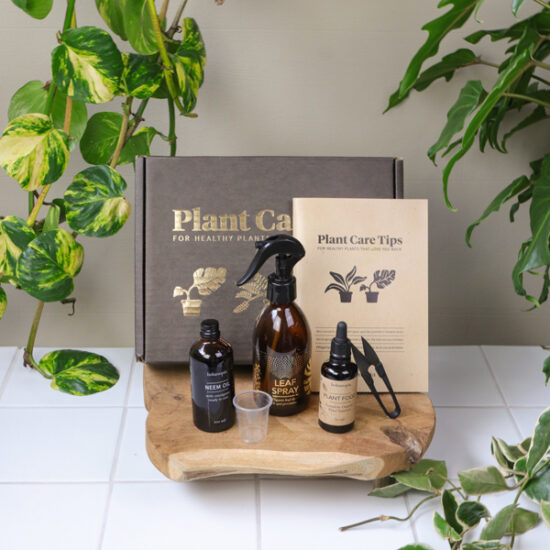
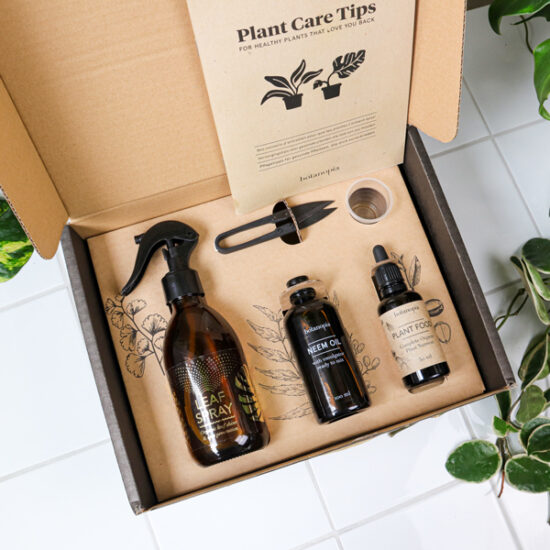
All the necessities in one box
Make repotting your plants simple and practical, with our Repotting Kit.
It contains all the tools and ingredients you need in one box. If we can’t make repotting faster, we can at least make it easier for you. The kit is also quite a bit cheaper than buying all the elements separately. And we deliver it to your doorstep, so no more procrastinating on this plant care chore.
We have two options, one for cacti and succulents, and one for all your other indoor plants, so you can pick what works best for you.
Helpful tools
These might come in handy for all of your plant repotting activities.